
If your bathroom still has the original pink tile from the 1960s or worse, the avocado green from the ’70s you’re not alone. Victoria is full of character homes with bathrooms that haven’t been touched in decades. Craftsman bungalows in Fernwood, heritage houses in James Bay, split-levels in Saanich, stately Edwardians in Oak Bay they’ve all got charm in spades and bathrooms that are long overdue for a refresh.
The good news? A walk-in shower renovation is one of the highest-impact upgrades you can make to an older home. It adds real value, transforms how you start every morning, and when done right can feel like a genuine spa experience without erasing the character that makes your house worth living in.
The challenge is that not every tile idea that looks incredible on Instagram actually translates well to the realities of an older Victoria home. Footprints are smaller. Walls aren’t always plumb. Plumbing shows up in inconvenient spots. And the bones of these homes deserve more than a rushed reno that cuts corners on waterproofing.
This guide covers the tile ideas that actually work the styles, materials, layouts, and finishing details that look exceptional in Victoria’s older housing stock plus everything you need to know about what a proper installation involves before you spend a dollar on materials.
Why Tile Choice Matters More Than You Think
Walk into any home improvement store and you’ll find hundreds of tile options. Walk into a design showroom and there are thousands. The temptation is to fall in love with something based on how it looks in a display under controlled lighting, on a flat surface, next to perfectly matched grout.
What you don’t see in that display is what the tile looks like in a 36-inch-wide shower in a 1940s home, with a window that faces north, walls that are slightly out of square, and a drain that someone shifted to the wrong spot in a previous reno. That’s where tile selection gets real.
In Victoria’s character homes specifically, the most common bathroom challenges include:
Compact dimensions. Older homes weren’t designed around the concept of the walk-in shower. Many bathrooms were built around a tub, sometimes a claw-foot, sometimes a standard alcove. Converting that space or carving a shower out of a larger bathroom footprint means working with dimensions that are often tighter than today’s standard.
Non-standard layouts. Victorian and Edwardian homes in particular have bathrooms that don’t follow modern conventions. Plumbing may be on an exterior wall. The ceiling might slope. A structural beam might land exactly where you’d ideally place the showerhead. An experienced tile company in Victoria will know how to work around these constraints rather than being surprised by them.
Aging infrastructure. What’s behind the walls matters as much as what goes on them. Older homes may have lathe and plaster rather than drywall, original tile set in sand-bed mortar, inadequate waterproofing (or none at all), and plumbing that needs updating before any renovation work begins in earnest.
Heritage aesthetics. Not every homeowner wants their 1910 Fairfield house to look like a contemporary condo. The best shower renovations in older Victoria homes balance something that feels genuinely modern and functional with materials and finishes that feel at home in a character house.
With all of that in mind — here are the tile approaches that consistently deliver beautiful results in Victoria’s older homes.
8 Walk-In Shower Tile Ideas for Victoria Character Homes
1. Large-Format Marble or Marble-Look Porcelain
There’s a reason large-format tile has dominated bathroom design for the past decade — it works. Big slabs (24×48 inches or larger) create an immediate sense of luxury and, counterintuitively, make a small shower feel more spacious. Fewer grout lines means the eye can travel across the surface without interruption, which reads as more room.
Genuine marble is stunning and has been used in grand Victoria homes for over a century. It’s appropriate to the era and the aesthetic. The honest caveat: natural marble is porous, requires sealing, and demands consistent maintenance to prevent staining and etching. In a high-use shower, that’s a real consideration.
High-quality marble-look porcelain — particularly large-format slabs with through-body veining — gives you nearly the same visual result with dramatically better durability and moisture resistance. It won’t stain from shampoo. It won’t etch from soap. It doesn’t need annual sealing. On Vancouver Island, where humidity is a constant factor, that resilience matters.
Best fit: James Bay Edwardians, Oak Bay heritage homes, older character homes with generous ceiling heights. The scale of large-format tile suits rooms with architectural presence.
2. Handmade-Style Subway Tile — Done Differently
Subway tile is the classic choice, and for good reason: it’s timeless, it suits older homes, and it reads as craftsmanship rather than trend. The problem is that the standard 3×6 white bricklay has been executed so many times that it no longer reads as a design choice — it reads as a default.
For a Victoria character home, there are ways to use the spirit of subway tile while making the result feel genuinely intentional:
Elongated subway (3×9, 4×12, or even 4×16) in a stacked vertical layout creates a taller, more architectural feel. It draws the eye upward and adds perceived height to a compact bathroom.
Zellige-style tile is hand-glazed ceramic with a deliberately irregular surface. Light hits it differently at different angles — the glaze has depth, colour variation, and subtle texture that makes a tile wall look alive rather than flat. It nods to historical craftsmanship in a way that feels entirely appropriate in a heritage home.
Coloured grout is one of the most impactful and underused tools in a shower renovation. The same white subway tile looks completely different with charcoal grey grout versus warm greige versus a bright contrasting tone. The grout colour defines the pattern — or softens it — and choosing it intentionally changes everything.
Brick-pattern variations: Stacked (tile aligned directly above one another rather than offset) gives a more contemporary, grid-like look. Herringbone adds visual complexity and movement. Both work well with traditional subway tile proportions in smaller showers where you want the pattern to be the focal point.
Best fit: Fernwood bungalows, Fairfield Craftsmans, older condos in Cook Street Village and downtown Victoria.
3. Fluted or Textured Stone-Look Tile
Fluted tiles — ceramic or porcelain with vertical ridges running the height of the tile — have become one of the most sought-after shower wall options in the past few years, and the reason is simple: they add three-dimensional texture and shadow play without requiring a complicated installation or a busy pattern.
In a walk-in shower, fluted tile on the main walls paired with a smooth, contrasting floor tile creates a result that looks genuinely designed. The texture catches light differently depending on the time of day and the direction of your lighting, which means the shower never quite looks the same twice.
Stone-look options — slate, travertine, sandstone, and basalt-look porcelain — are a strong alternative for homeowners who want warmth and organic character rather than sleek contemporary polish. These work beautifully in homes where you’re preserving original hardwood floors, wood trim, and other natural materials. A shower that feels like it belongs to the same material language as the rest of the house always looks more intentional than one that looks transplanted from a different aesthetic entirely.
Textured tile also has a practical benefit in shower floors: slip resistance. A matte or textured surface provides better grip when wet than a polished one, which matters both functionally and for safety.
4. A Bold Feature Wall with Mosaic or Patterned Tile
One of the most effective strategies for a walk-in shower in a smaller space is a single strong feature wall. The idea: tile the back wall (the one you see when you enter the shower) in something with visual impact, and use a simple, complementary tile everywhere else. Simple field tile on three sides, dramatic patterned tile on one.
This approach does a lot with relatively modest square footage of statement material, which helps manage cost while still delivering a high-impact result.
For older Victoria homes, several pattern styles feel period-appropriate without being costume-y:
Moroccan zellige or encaustic patterns have a handcrafted quality that suits older homes beautifully. They’re not Victorian in a strict historical sense, but the artisan aesthetic translates well into character home bathrooms.
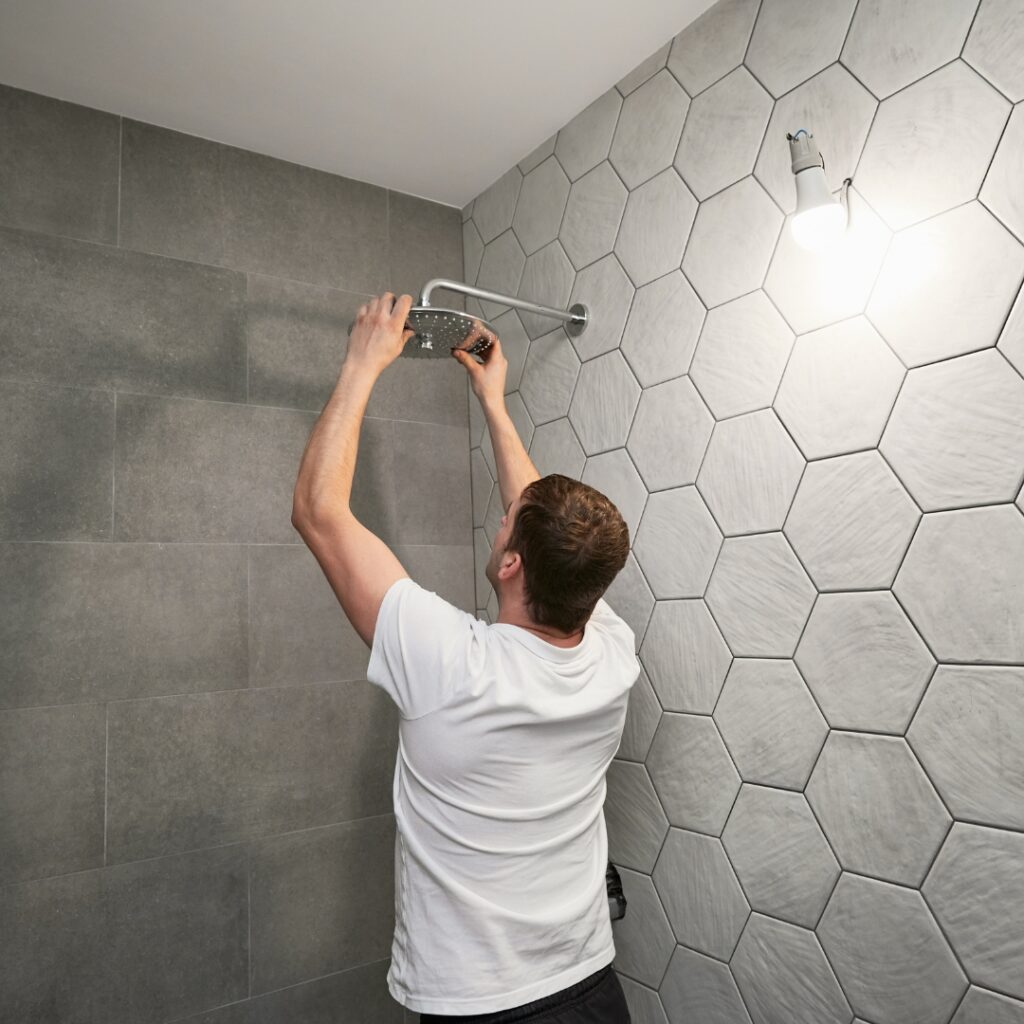
Geometric hexagons — especially in matte black, sage green, or warm terracotta — are both contemporary and historically resonant. Hexagonal tile was common in Victorian and Edwardian bathrooms, so using a bold version of it reads as a nod to history rather than a departure from it.
Art deco motifs are an obvious match for homes built in the 1920s and 1930s. Fan shapes, chevrons, stepped geometrics — there’s a huge range of tile options that lean into the art deco moment without being heavy-handed.
Handpainted Spanish or Portuguese-style tile is a more adventurous choice but one that pays off in the right home. In a bathroom that already has a lot of character, a feature wall in handpainted tile adds something that feels genuinely collected and personal.
5. Mixed Materials — Tile and Natural Stone Together
Some of the most beautiful shower renovations in Victoria’s character homes combine more than one material type rather than committing entirely to one. The result feels layered, considered, and high-end — even when the individual materials are relatively modest.
Common combinations that work well:
- Porcelain field tile on shower walls with a natural stone threshold at the shower entry — marble, granite, or slate
- Tiled shower floor in a small mosaic with a stone pebble accent band at the base of the walls
- Large-format porcelain on the main walls with a natural travertine niche inset for product storage
- Matte ceramic on three walls with a marble slab accent on the fourth, framed in contrasting grout
The key with mixed materials is ensuring they’re compatible from a substrate and installation standpoint — different materials expand and contract differently, require different setting materials, and may need different maintenance approaches. This is exactly the kind of detail that distinguishes an experienced tile installation company in Victoria from a generalist contractor.
6. Warm Neutrals and Earth Tones
Cool greys and stark whites dominated bathroom design for most of the 2010s. What’s replaced them — and what translates particularly well into older Victoria homes — is a palette of warm neutrals: creams, taupes, warm beiges, clay tones, and muted terracottas.
These colours do something that cooler palettes don’t: they make a bathroom feel warm, even when it’s wet. They complement natural wood elements. They age gracefully rather than looking clinical. And in older homes, they feel coherent with the material world of the rest of the house in a way that stark white tile often doesn’t.
In a walk-in shower specifically, a warm neutral field tile in a larger format (18×36 or 24×24) with a slightly deeper toned floor tile in the same palette creates a cohesive, enveloping feel — the kind of shower that actually makes you want to spend time in it.
7. Dark Tile — Navy, Forest Green, Charcoal, Black
Dark tile in a shower is a commitment, and it’s one that pays off with the right light and the right home. In older Victoria homes with higher ceilings and good natural light, dark tile doesn’t read as oppressive — it reads as rich, moody, and dramatic.
Deep navy ceramic, forest green porcelain, slate grey or black stone-look tile — all of these have been having a sustained moment in bathroom design, and all of them suit the aesthetic of Victoria’s character homes better than the contemporary condo context they’re often shown in.
A few practical considerations with dark tile: grout lines show water spots and soap residue more visibly than on lighter tile, so maintenance habits matter. Sealing grout properly (and using an epoxy or stain-resistant grout) is especially important. And the lighting in the shower needs to be thought through — a dark tile shower with a single overhead fixture is going to feel different from one with layered lighting.
8. Classic Black and White
Some things are classic for a reason. Black and white tile has been used in Victoria’s older homes since the early 1900s, and it translates into a walk-in shower format with the same reliability it’s always had.
The contemporary version updates the proportions and patterns: small penny tile floors with large white field tile walls, or a bold black geometric floor with white vertical tile, or white large-format tile with matte black fixtures and grout. These combinations feel both historically grounded and genuinely current — which is exactly what a character home renovation should feel like.
The Details That Make or Break a Shower Renovation
Tile selection gets most of the attention, but in a walk-in shower, the details are equally important.
Waterproofing. In any shower, and especially in an older home where you may be tiling over an original substrate, a proper waterproofing membrane is non-negotiable. This is what prevents moisture from migrating into the wall assembly, causing mould, rot, and structural damage over time. A reputable tile company in Victoria will not skip this step. If a quote comes in suspiciously low, it’s often because waterproofing has been underspecified or omitted entirely.
Shower niche. A recessed niche built into the shower wall for shampoo and soap is one of the most practical features you can include, and it’s also one of the most aesthetically important. A niche tiled in a contrasting material or pattern becomes a design feature. A niche done poorly looks like an afterthought. Building it properly means framing it between studs, waterproofing it thoroughly, and tiling it cleanly with appropriate edge trim or bullnose tile.
Linear drain. A linear drain — a long, narrow drain running along one wall rather than a point drain in the centre of the floor — allows the floor to slope in a single direction, which simplifies tile layout and creates a cleaner look. It’s also easier to clean than a centre drain with a standard grate. In a shower renovation in an older home, switching to a linear drain is worth considering if the plumbing allows for it.
Heated floor. Victoria doesn’t get the deep cold that other Canadian cities do, but the damp, grey winters on Vancouver Island mean that stepping onto a cold tile floor at 7am is genuinely unpleasant from October through March. In-floor heating under the shower tile — a low-profile electric mat installed under the tile before it’s set — is an upgrade that costs relatively little in the context of a full renovation and delivers noticeable daily comfort.
Grout. Already mentioned in the tile section, but worth repeating: grout choice is one of the most impactful and most overlooked decisions in a shower renovation. The colour matters, but so does the type. Epoxy grout is significantly more stain-resistant and durable than cement-based grout, which makes it worth the additional cost in a shower environment. Specifying this upfront saves significant maintenance headaches down the road.
Fixture finish. Chrome, matte black, brushed gold, polished nickel — the finish on your showerhead, valve, and any accessories should be chosen in relation to the tile rather than in isolation. In an older Victoria home, brushed nickel or brushed gold tends to feel more harmonious with the aesthetic than chrome, which reads slightly more clinical. Matte black works well with bold or dark tile but can feel harsh against warm, light palettes.
What to Expect When Working in an Older Victoria Home
If your home was built before the 1980s — and a significant portion of Victoria’s residential stock was — there are a few things a qualified tile company will raise before work begins.
Existing waterproofing. Many older shower surrounds were built with no proper waterproofing membrane. Cement board alone doesn’t waterproof a shower. A thorough renovation will address this properly before new tile goes on.
Substrate condition. The walls and floor need to be stable, sound, and level for tile to install correctly and last. Older plaster walls may need patching or full replacement with cement board in the shower area. Subfloors may need reinforcement. This is normal in older homes and not a reason to avoid renovation — it just needs to be scoped and priced correctly upfront.
Asbestos. Homes built before 1990 may have asbestos-containing materials in drywall compound, floor adhesives, or ceiling texture. A responsible contractor will flag the possibility and advise on testing before any demo work starts. This is standard practice and not cause for alarm — it just affects how demo is handled.
Plumbing. Walk-in shower renovations often involve moving the drain location, repositioning the valve, or upgrading to a pressure-balanced or thermostatic mixing valve. In an older home, this may also be an opportunity to assess the condition of supply and drain lines and address any issues that have been building up.
None of this should deter you from the renovation. It’s simply part of working with older homes honestly and well — and it’s the kind of thing a qualified tile floors contractor in Victoria will walk you through clearly, before work begins, not midway through demolition.
How to Choose the Right Tile Company in Victoria
The difference between a shower renovation that looks great for twenty years and one that starts failing in three is almost entirely about the quality of installation — not the quality of the tile.
Here’s what to look for when choosing a tile company for a walk-in shower in an older Victoria home:
- Specific experience with character homes. Ask whether they’ve worked in pre-war homes, what challenges they typically encounter, and how they approach them.
- Waterproofing specification. Ask what waterproofing system they use and how they detail around the niche, drain, and wall-floor transition.
- References or portfolio. Ask to see examples of shower work in similar homes. Most good contractors have photos and are happy to share them.
- Transparent quoting. A detailed quote that itemizes tile, setting materials, waterproofing, grout, and labour separately is a sign of professionalism. A single lump-sum quote with no breakdown is harder to evaluate.
- Licensing and insurance. A licensed and insured contractor is not optional in British Columbia, and any reputable tile company in Victoria will be able to confirm this readily.
Ready to Start?
Floors2Go is a locally owned tile and flooring company serving Greater Victoria, with decades of experience in residential renovations — including plenty of character homes across Fernwood, Fairfield, James Bay, Oak Bay, Esquimalt, Saanich, and Langford that needed exactly this kind of skilled, thoughtful approach.
Their team handles everything from tile selection and layout planning to waterproofing, heated floors, shower niches, and full bathroom renovations. Free consultations, honest quotes, no pressure.